While there are specially designed cameras for astrophotography, a lot of great images are captured with DSLR cameras. A couple of key features of DSLR cameras is the ability to put a t-adapter in place of a lens to attach it to a telescope, and the ability to do really long exposure photos. I bought a used Canon 500D / T1i on eBay a few months ago which has been great to get started with.
DSLR cameras have internal filters that block an increasing amount of the light on the red end of the spectrum. This balances the colors in photos to match what our eyes naturally see. The challenge with this is that many nebulae emit light in the red wavelengths. With how faint nebula typically are, this blocking of the red wavelengths means we need to take longer and more exposures in order to capture images of these nebula.
To solve this, many people either have their camera modified or modify it themselves to take out this filter. Some people take out the filter(s) and leave it out, others replace it with clear glass, and others put in a different filter. Because I plan to do a lot of imaging with my refractor telescope, blocking 100% of the ultraviolet (UV) and infrared (IR) light is more important than with other types of telescopes. There are some really good websites that provide step by step instructions for doing this so naturally I decided to try it myself.
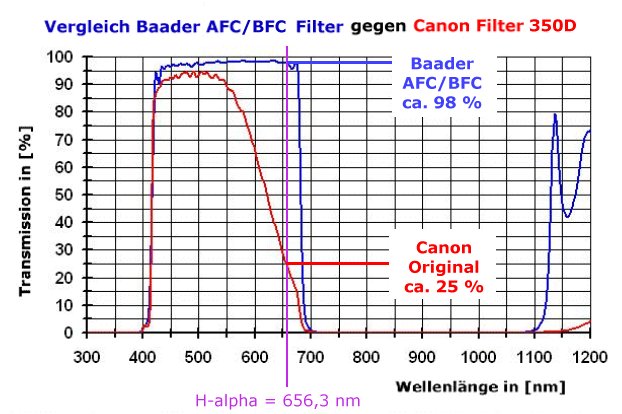
I chose to put in a Baader BCF replacement filter that lets almost 100% wavelengths across the visible light spectrum but blocks 100% of the IR and UV light. Visible light ranges from about 390 nm at the ultraviolet end to 700 nm at the infrared end of the spectrum. You can see in the chart below how much light is passed with the original filters (red line) vs. the replacement filter (blue line). The magenta line at 656.3 nm is the H-alpha (Hα) spectral line created when a hydrogen electron falls from its third to second lowest energy level and is emitted by many emission nebulae. You can see that with the original filters only 25% of the Hα light is getting to the cameras imaging sensor.
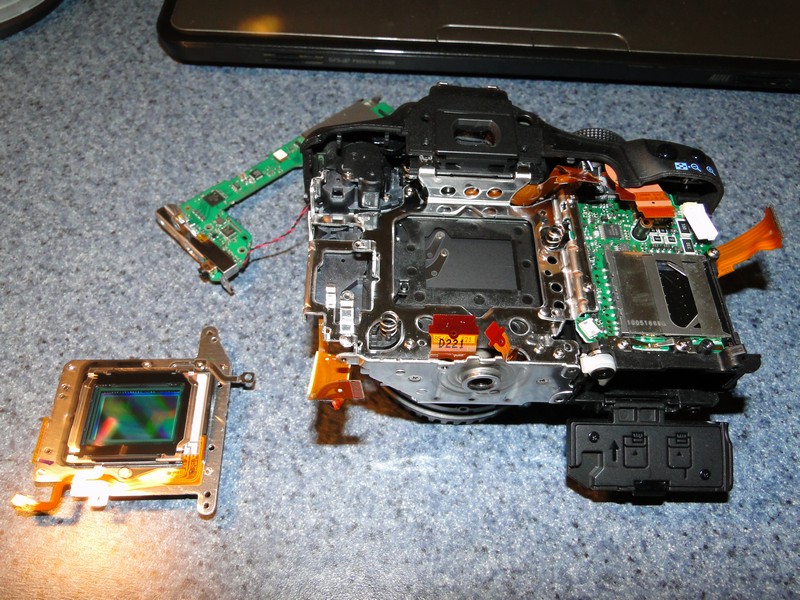
The modification itself wasn’t too difficult, but did take a bit of time and organization. There were 33 little screws and 11 ribbon cables that needed to be removed as I disassembled the camera to get at the imaging sensor / filter unit. With the back section of the camera and another circuit board removed, you eventually get to remove the imaging sensor shown in the lower left of the picture below.
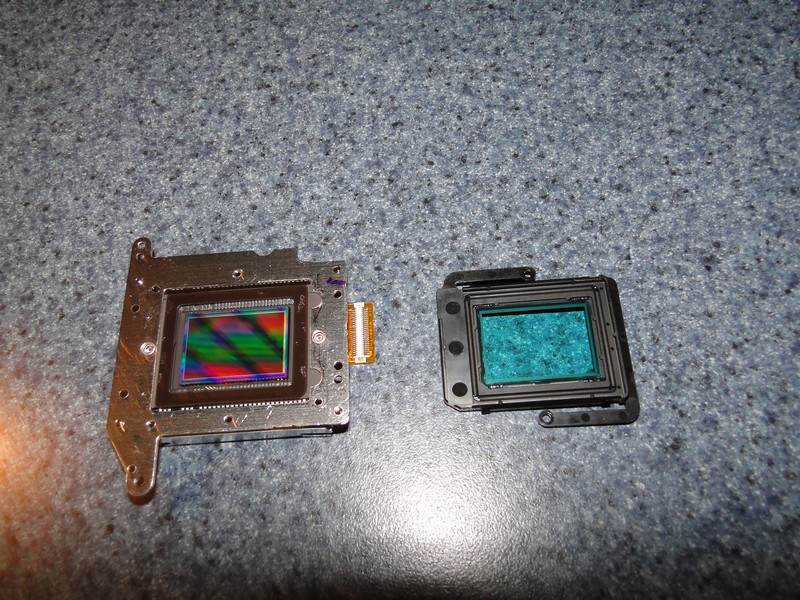
There’s actually two different filters in front of the imaging sensor, each of which appear as a thin piece of glass. After removing a metal clip around and a couple more screws, I was able to separate the front filter, the second filter (on right in below image) and the imaging sensor itself (on left). You can see the light blue color of the original filter. I basically had to pry it from the black plastic frame, then glue in the new filter which basically looks like an almost clear piece of glass.
After letting the adhesive cure overnight, I cleared a little dust from the filter and then started the process of reassembling the camera. One more challenging part was getting three of the screws reinstalled at exactly the same height as they originally were. They are critical to keeping the sensor square to the cameras imaging axis and keep the focal point at just the right position. Before I took the screws out I had bottomed them out, keeping track of how many turns it took for each. Then when I reinstalled them I just reversed the process.
Getting all the ribbon cables seated and secured was more challenging, especially for a couple of them. Once I had the camera all put together I turned it on and the screen indicated that there was no SD card, even though it was inserted. I partially disassembled the camera a couple of times until I finally realized I hadn’t fully seated one of them. I found a better way to get it seated and now the camera seems to be fully working again. I haven’t taken any astrophotos yet, but daylight pictures are much redder now, which is how things would look if our eyes didn’t naturally block light similar to what the standard filters try to emulate.